Protecting Floors During a Home Remodel Safely

A new kitchen, luxury bath, or whole-home update should leave your home more beautiful, not leave permanent marks on the rooms around it. Protecting floors during home remodel work is one of the clearest signs that a project is being managed with care. It reduces avoidable damage, controls dust, protects finished surfaces, and makes daily life more manageable while work is underway.
For San Antonio homeowners, this deserves attention before demolition begins. Many established homes in Alamo Heights, Terrell Hills, Stone Oak, and nearby communities have original hardwood, natural stone, high-end tile, or recently updated flooring outside the renovation area. Those surfaces can be difficult and expensive to match if they are scratched, stained, or cracked during construction.
Why Floor Protection Needs a Real Plan
Floor damage rarely comes from one dramatic mistake. More often, it happens gradually: grit under a worker's boot, a moving cart that catches an edge, a dropped tool, water tracked from a plumbing task, or repeated trips through a hallway without a protected path. Construction dust is abrasive, too. Left under protective materials or walked across a finished floor, fine dust can act like sandpaper.
A thoughtful protection plan accounts for how people and materials will move through the home. That includes the route from the entry point to the work area, where tools and materials will be staged, which rooms remain occupied, and how debris will leave the house. The right approach is not simply covering everything with a thin plastic sheet. Protection has to fit the surface, the traffic level, and the length of the project.
At PHRS Remodeling, the level of floor protection is also matched to the work being performed. A pathway used primarily for foot traffic may need a different system than an area where demolition debris is being removed or cabinets, appliances, countertops, or framing materials are being carried. During heavier phases of construction, additional impact-resistant protection may be appropriate over existing flooring to help reduce the risk of damage from dropped materials and concentrated weight.
This is especially relevant in renovations where new finishes are being installed in phases. A floor may need protection before cabinetry arrives, after paint is complete, or while countertop teams and appliance installers enter the space. The protection plan should change as the job changes.
Protecting Floors During a Home Remodel by Surface
Different flooring materials require different safeguards. A product that works well over durable tile can create problems on a delicate hardwood finish. That is why experienced remodeling teams inspect existing conditions before selecting materials and methods.
Hardwood and engineered wood
Hardwood floors are vulnerable to scratches, dents, moisture, and adhesive residue. A breathable, non-staining underlayment is often the first layer, followed by a heavier temporary floor covering designed for construction traffic. Seams should be secured carefully so they do not shift or become a trip hazard.
Tape selection matters. Strong tape applied directly to a finished wood surface can pull up finish or leave residue, particularly in older homes where coatings may be worn. Whenever possible, protection should be secured to itself or to a sacrificial edge rather than directly to the floor. Protection also needs routine inspection. If grit gets beneath it, the covering can cause the very scratches it was meant to prevent.
Why We Avoid Taping Floor Protection Directly to Finished Flooring
One of the most important details in floor protection is how the protective material is secured. At PHRS Remodeling, we avoid applying tape directly to finished engineered wood, hard wood, or luxury vinyl plank whenever possible. Even tapes marketed for construction use can react differently with flooring finishes, especially when they remain in place for several days or are exposed to heat and changing temperatures.
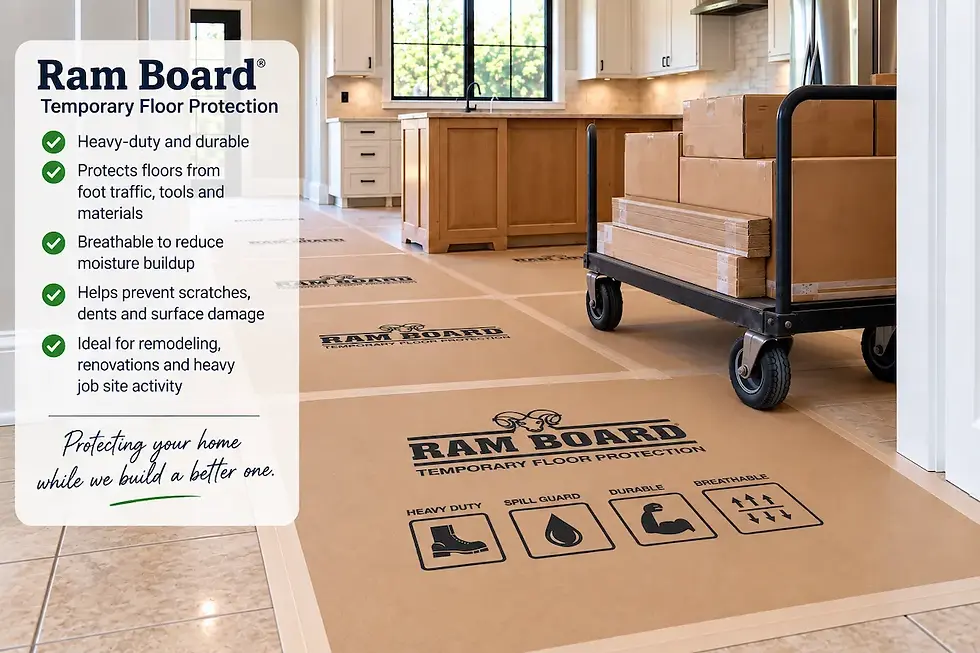
Removing the tape can sometimes leave adhesive residue, discolor the surface, or even pull at the factory finish. Instead, protective materials such as Ram Board can be secured to themselves or joined along the seams without attaching the tape directly to the finished flooring.
This small detail can make a significant difference. Protecting a floor should never create the very damage the protection was intended to prevent.
Tile, stone, and polished concrete
Tile and stone can handle more traffic than wood, but they are not indestructible. Dropped materials can chip edges or crack individual tiles. Natural stone can also stain if exposed to certain liquids, grout, oils, or construction chemicals.
For higher-risk areas, PHRS Remodeling may use heavier-duty protection such as Ram Board or a similar temporary floor-protection product. This is especially important when demolition debris, cabinetry, countertops, appliances, framing materials, or other heavy items will be moved through an existing finished area. The additional protection helps distribute impact and reduces the chance of chips, scratches, cracked tile, or damage to grout joints.
Carpet
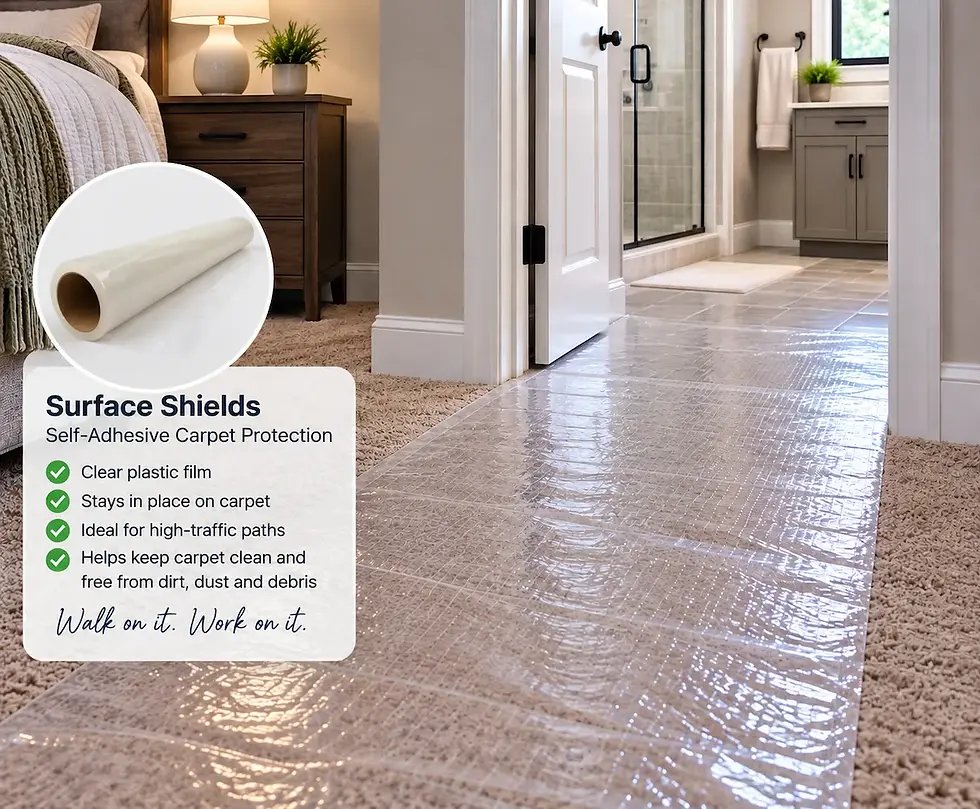
Carpet protection begins with controlling soil. Contractors should use designated pathways, shoe covers when appropriate, and a durable adhesive film or temporary runner made specifically for carpet. The wrong film, left in place too long, can be difficult to remove or may leave adhesive behind.
Carpeted rooms near a renovation should also be isolated from dust. A hallway may look clean at the end of the day while fine particles have settled deep into carpet fibers. Containment barriers and daily cleanup help preserve the condition of rooms that are not part of the remodel.
Luxury vinyl, laminate, and newer resilient floors
These floors can scratch, dent, discolor, or react to certain tapes and rubber-backed coverings. Check manufacturer recommendations, when possible, particularly if the flooring is new or still under warranty. Avoid assuming that a hard surface needs no protection. A rolling tool chest, ladder feet, or a dragged appliance can leave damage that is difficult to conceal.
Adhesive is a particular concern with LVP. Tape should not automatically be applied directly to the flooring simply because the surface appears durable. Depending on the product and finish, adhesive can leave residue, cause discoloration, or potentially affect the wear layer or finish when removed. Whenever possible, PHRS Remodeling secures floor protection without adhering tape directly to the finished LVP surface.
Start With Routes, Not Just Rooms
The renovation room receives the most attention, but the path to that room often faces the greatest risk. A kitchen remodel may require daily travel through an entry, living room, hallway, or garage. A bathroom renovation may mean repeated trips through a bedroom or across a finished landing.
Before work begins, identify one primary construction route and protect it from the exterior entry through the work zone. Where practical, use a separate path for debris removal. This limits foot traffic across the rest of the home and keeps the jobsite more organized.
Door thresholds, stair treads, corners, and transitions between flooring types deserve extra attention. These are common impact points. Protective corner guards, stair coverings, and secured transition materials help prevent a rolling cart wheel, a cabinet edge, or a heavy box from causing damage in a high-risk area.
Homeowners can help by clearing fragile furnishings and loose rugs from those routes before the first day of work. This is not about shifting responsibility to the homeowner. It allows the remodeling team to install protection efficiently and reduces uncertainty around personal items.
Dust and Moisture Can Defeat Good Protection
Floor covering alone does not control the full risk. Dust migration, plumbing work, and changing weather conditions all affect how well a home is protected.
During demolition, drywall work, sanding, and cutting, temporary containment barriers should separate the active work area from occupied spaces. Depending on the scope, ventilation controls or air-cleaning equipment may also be appropriate. The objective is to keep dust from traveling through the house and settling on floors, furniture, and cabinetry.
Moisture requires the same attention. Plumbing changes, tile work, and unexpected rain during exterior access can introduce water where it does not belong. Protective materials should be checked after wet work, not simply covered and forgotten. If a floor covering becomes saturated or debris-heavy, it may need to be removed, the surface cleaned and dried, and fresh protection installed.
Daily Jobsite Care Makes the Difference
Floor protection performs best when paired with consistent housekeeping. At the end of each workday, a professional team should assess the construction route, remove loose debris, and address new wear before it becomes a larger problem. This keeps small issues from accumulating over a multiweek project.
A practical daily routine typically includes keeping pathways clear, vacuuming or collecting abrasive debris, checking that coverings are secure, and looking for moisture, tears, or exposed edges. It also means storing materials in a planned location instead of placing heavy boxes wherever there is open floor space.
There is a balance to strike. Overprotecting every square foot with thick material can create trip hazards, trap dust, and make a home harder to navigate. Under protecting high-traffic areas can lead to costly repairs. The best plan targets the surfaces and travel routes that truly need it, then adjusts as the project moves from demolition to finish work.
What to Ask Before Your Remodel Begins
During the planning phase, ask your contractor how existing floors will be documented and protected, which routes workers will use, and how dust will be contained. Ask what happens if protection is damaged during the job and how often it will be inspected. Clear answers usually reflect clear project coordination.
It is also reasonable to point out surfaces that matter most to you, such as original oak flooring, a hand-finished tile entry, or a newly installed carpeted staircase. A detailed in-home walkthrough gives the contractor an opportunity to note those conditions before work begins and build the right safeguards into the scope.
At PHRS Remodeling, careful site preparation is part of treating each home with the respect it deserves. Owner involvement, organized coordination, and a final quality walkthrough support the same principle: premium remodeling should protect the home around the project as carefully as it improves the room within it.
Before the first cabinet is removed or the first wall is opened, take a slow walk from the front door to the work area. The floors along that route tell you exactly where a careful remodel should begin.
Ready to Start Your Remodeling Project?
Whether you’re planning a kitchen remodel, bathroom renovation, custom cabinetry, built-ins, or a whole-home transformation, we’d love the opportunity to meet with you and discuss your vision.
At PHRS Remodeling, we’re a family-owned business with more than 25 years of remodeling experience. We pride ourselves on quality craftsmanship, clear communication, honest advice, and treating every home with the care and respect it deserves.
If you’re considering a remodeling project, we’d be honored to help.
Schedule your free in-home consultation with PHRS Remodeling to discuss your project, priorities, and next steps.
📞 Call us: (210) 873-1111
⭐ Explore our recent projects in our gallery
⭐Check us out on Google, Facebook, and Instagram!
We look forward to helping you create a home you’ll love for years to come.


